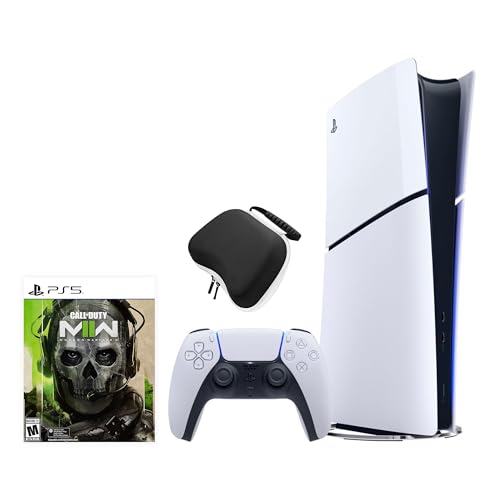
I still remember the first night I set up my console and felt overwhelmed by menus, updates, and options. I wanted a clear plan that would make gaming feel smoother and more personal right away.
In this guide I walk you through practical, hands-on tweaks for Standard, Slim, and Pro models. I focus on comfort, speed, and control so you notice gains every session.
Expect concise steps for video, audio, network, and controller settings, plus smart storage and capture choices. I also cover PS4 upgrades and useful menu paths pulled from the actual interface.
My goal is simple: give actions you can apply now that boost your setup and keep the console running well for years.
Key Takeaways
- Quick setup moves improve comfort and responsiveness.
- Model-specific tweaks matter for Standard, Slim, and Pro.
- Follow menu paths for easy PS4-to-PS5 upgrades.
- Small audio and video adjustments lift immersion fast.
- Routine care and safe options protect your hardware.
Start here: my quick wins to optimize your PS5 right now
These two controller moves give you instant convenience. I begin every session by customizing the Control Center and mastering the mute behavior.
Tap the playstation button to open the Control Center, then press Options on any card to reorder, remove, or add shortcuts like Voice Control. I pin Network, Bluetooth Accessories, and Power so common tasks are one press away.
Customize cards fast
- I show you how to tap playstation button, then use on-screen labels to move Downloads, Mic, Music, and other cards.
- Add hidden items so tools live in the Control Center without digging into full settings.
- Remember: layouts are profile-specific, so each user can have a personal setup.
Silence audio instantly
Press and hold the DualSense mute button to mute the mic and all console audio. A tap toggles only the mic.
“A long press mutes everything until you press again; a tap toggles mic mute.”
Follow steps shown on-screen, test a couple of layouts, and you’ll save time every session.
Customize your Welcome Page and Home Screen like a pro
I tune the Welcome Page first because it’s where I decide what I see each session. A clean layout saves time and keeps the console feeling personal.
Edit widgets, resize with L1/R1, and rearrange with Square
Choose Change Preset on the Welcome Page, then pick Edit Widgets. I toggle tiles I use and hide those I don’t.
Press Square to move tiles. Use L1 and R1 to resize. Bigger widgets make status items pop.
Change background from the top right corner and add animated themes
Open the top bar at the top right corner and pick Background. I like animated themes for mood, or I upload a photo for brand flair.
Try the large layout for big cards and alternate display styles on each widget.
Keep in Home to lock games you always want on your Games home screen
Highlight a title, open options, and select Keep in Home. That locks favorites on the games home screen carousel so they never vanish.
- I group things like battery, friends online, and storage in the first row for quick status checks.
- Set a minimalist grid if you prefer speed over visuals and tidy up once a month as your library changes.
“A neat Welcome Page gets you into play faster and keeps useful features front and center.”
Tune your display settings for smoother performance and lower latency
I start by tuning video options that directly cut input lag and smooth motion. These are the small changes that make a big difference in responsiveness and frame pacing.
Enable VRR in Screen and Video and, when needed, apply VRR to unsupported games. This can reduce stutter on compatible displays and help motion feel cleaner.
Test 1440p for steadier frame rates
Try 1440p when a game drops frames at native 4K. Lower resolution reduces GPU load, often improving sustained frame rates and cutting input lag.
Protect OLED screens
Set Screen > Dim screen while inactive. This helps avoid burn-in from static HUDs, paused screens, and long map sessions.
- I walk you through Screen and Video settings to enable VRR and apply it when necessary.
- I include follow steps so you can A/B test 1440p versus 4K and note differences.
- Pair VRR with Performance Mode for best frame pacing in supported titles.
- On ps5 pro, tuned display choices unlock higher frame headroom for enhanced games.
“Verify your HDMI cable and TV input support these features to avoid unexpected drop-offs.”
Quick checklist: VRR on, VRR applied to unsupported games, 1440p test on/off, and OLED dim timer set for long sessions on your console.
Upgrade your audio game for immersive 3D sound and Atmos
Great sound starts in the Sound menu—small changes make games feel alive. I walk you through the key audio settings that improve spatial cues and music playback on your setup.
Create a personalized 3D Audio profile
Headphones > Create 3D Audio Profile runs a seven-step wizard. I use the on-console prompts and test clips to fine-tune directional accuracy. Save the profile and compare it with TV speaker virtualization for clear differences.
Match HDMI device type to your gear
Open Sound > Audio Output and set the HDMI device type for TV speakers, soundbar, or AV receiver. This ensures levels and formats are correct and avoids sudden volume shifts when games load different mixes.
Media apps and quick controls
I install Spotify or Apple Music so I can run playlists while playing. A double-press of the PlayStation button opens media controls for play, skip, and volume without leaving a game.
- I balance game and music in the audio mixer so critical cues remain audible.
- Try Atmos or demo clips to confirm channel mapping on your system.
- Remember that a subscription can unlock higher quality streams and curated playlists.
“Test both headphone 3D and TV/AV virtualization to find the most natural sound for your room.”
Make the DualSense controller faster, quieter, and longer-lasting
I focus on quick DualSense adjustments that make aim tracking crisper and nightly play quieter.
Wired input for lower latency
Accessories > Controller > Communication Method: set to USB Cable. A wired link sends inputs over the cable and trims delay for aim and menu response.
Extend battery life
System > Power Saving > Set time until controllers turn off: choose 10 minutes. This power saving step preserves charge when you step away.
Subtle haptics that help
Accessibility > Controller: enable navigation haptics so menu moves give gentle feedback.
Notifications: enable haptic feedback so invites and messages cue you without loud on-screen alerts.
- Make sure your USB-C cable supports data and is firmly seated for stable wired input.
- Lower controller speaker volume and mic monitoring for quiet late-night play.
- Unplugging reverts to Bluetooth, so you can switch between wired desk sessions and couch play.
- Keep a spare cable at the console for guests and fast charging between matches.
“If you want max run time, turn off navigation haptics; they use some battery.”
| Action | Menu Path | Benefit |
|---|---|---|
| Set Communication Method | Accessories > Controller | Lower input latency |
| Controller idle timer | System > Power Saving | Longer battery life |
| Enable navigation haptics | Accessibility > Controller | Subtle tactile feedback |
| Enable notification haptics | Notifications > Haptics | Quiet alerts |
Quick latency test: flick menus, aim at a moving target, and press the PlayStation button to verify smoother response on your ps5.
Speed up downloads and online play with smarter network settings
Network choices are one of the fastest ways I speed up downloads and lower lag on my console. A few quick changes in Network > Settings deliver steady gains in daily play and large updates.
Lock Wi‑Fi band to 5 GHz or 6 GHz instead of Automatic
Choose your active Wi‑Fi in Network > Settings, press Options, and lock the band to 5 GHz or 6 GHz. This prevents the system from falling back to slower 2.4 GHz during busy hours.
Use Ethernet for data transfer and stable gaming sessions
Ethernet remains the gold standard for consistent ping and throughput, especially during big game updates or PS4-to-ps5 transfers.
Let say you’re migrating saves or large libraries: wired connections on both systems cut migration time dramatically.
- I recommend checking that your router supports Wi‑Fi 6E if you target 6 GHz reliability and to avoid channel congestion.
- Place the console in line of sight of the router or use quality mesh nodes to minimize dropouts when Wi‑Fi is necessary.
- Use router QoS to prioritize your PS5 for steady matchmaking and voice chat during peak usage.
Quick test plan: run a download with Automatic band selection, then lock to 5/6 GHz and compare times. Toggle background downloads and rest mode updates to off-peak hours, and make sure your DNS is a consistent, fast provider.
“Good network hygiene complements in-game tuning and keeps overall performance reliable.”
Organize your Game Library so you always find what you want
A clean collection makes it faster to pick a game and jump right in.
I create focused lists from Game Library > Your Collection > Create Game List. I pick titles for VR, co‑op, PS4 games, or any theme I need and then sort each list for quick access.
Use the options menu to rename, delete, and reorder lists so priority collections appear first. Reordering keeps nightly multiplayer or current single‑player picks at the top.
Practical list ideas and sorting
- I keep starter lists like Now Playing, Multiplayer Night, PS4 Games, and Completed so the library feels curated.
- Sort within a list alphabetically or by last played to surface likely launches.
- Separate live‑service titles from story games for clearer session planning.
- Create a Showcase list for guests so friends see what I’m eager to play together.
| Action | Menu Path | Benefit |
|---|---|---|
| Create themed list | Game Library > Your Collection > Create Game List | Faster access to grouped games |
| Rename or delete lists | Highlight list > Options | Keep the library current |
| Reorder lists | Options > Move | Place priority lists first |
| Sort within list | Open list > Sort | Surface most relevant titles |
“Thoughtful lists stop endless scrolling and help you rediscover games you already own.”
13 PlayStation 5 Tips to Get the Most Out
I outline a focused list of changes that make launching and playing your favorite titles faster.
Quick recap: I’ve got a compact set of tips tricks that cover display, audio, network, controller, content management, privacy, and safety.

Start with quick wins—small, high-impact moves that save seconds every session. Then layer deeper settings as you get comfortable.
Each change compounds: faster menus, smarter audio, and cleaner lists help you find and start games faster. I’ve got you pairing system presets with in‑game options so difficulty and performance match from launch.
- Fast wins: Control Center cards, mute behavior, and wired controller input.
- Next steps: VRR, 3D audio profile, and locking Wi‑Fi bands.
- Ongoing: Library lists, capture settings, and privacy toggles.
“Small, consistent changes add up—your console will feel faster and more personal each week.”
Short checklist: VRR on, 3D audio profile saved, controller wired test, library lists created, and notifications tuned. Keep this list handy when you try new games.
Move your PS4 life to PS5 without losing saves or content
Moving your progress should feel safe and simple. I walk you through three reliable options so you keep saves, app settings, and games you care about.
PlayStation Plus cloud saves
PlayStation Plus cloud saves are the easiest for just progress files. On PS4 go to Settings > Application Saved Data Management > Saved Data in System Storage > Upload to Online Storage.
On PS5 open Settings > Saved Data and Game/App Settings > Saved Data (PS4) > Cloud Storage > Download to Console Storage. Make sure you’re signed into the same PSN account on both systems.
Network Data Transfer
For bulk moves, I use the Data Transfer wizard. On PS5 go to Settings > System > System Software > Data Transfer, then follow steps to connect both consoles on the same network.
When prompted, hold power button on the PS4 until you hear the second beep. This wakes the PS4 for transfer and begins copying saves, installed PS4 games, and relevant content.
USB drive method
If you want an offline backup, copy saves on PS4: Settings > Application Saved Data Management > Saved Data in System Storage > Copy to USB.
On PS5 go to Settings > Saved Data and Game/App Settings > Saved Data (PS4) > USB Drive > Copy to Console Storage.
- I recommend Ethernet over Wi‑Fi for large data game app transfers; wired links finish faster and more reliably.
- Keep both consoles powered and on the same network until the process finishes.
- Copy only what you need so PS5 storage doesn’t fill with rarely played ps4 games and content.
- Keep the USB as a temporary backup until you confirm everything moved correctly.
“PlayStation Plus cloud is quickest for saves, Data Transfer is best for bulk moves, and USB is a safe offline fallback.”
Upgrade PS4 games and switch versions the right way
Upgrading a library entry often starts at the disc tray or the game hub—here’s how I handle both paths. Follow these clear steps so you start the correct build and keep DLC and trophies aligned with your goals.
For disc owners
Insert the disc, open the game hub, and claim the upgrade offer. Download or purchase the PS5 build as shown in the hub.
Keep the disc inserted whenever you play the upgraded version; the console validates ownership from the drive.
For digital owners
Open the same game hub in the PlayStation Store and select the upgrade offer. Download or purchase without needing physical media.
Switch versions from the games home screen
Go to Games Home Screen > Game Library, then highlight game want, open […] on the title, and choose the PS4 or PS5 build you need.
- I include follow steps to confirm which build you’re launching so save compatibility stays correct.
- Not every title offers a free upgrade; check fees and verify add-ons and DLC entitlements before installing.
- Remember trophies and performance mode preferences can differ by build—pick the version that matches your collection and performance goals.
“If you have a digital-only console, disc upgrades will not work—confirm your hardware before purchasing a disc version.”
Preset difficulty, camera, and performance so every new game feels right
My presets make sure each new title greets me with familiar controls and my preferred challenge level. A quick setup in the menus saves time and keeps sessions consistent.
Saved Data and Game/App Settings > Game Presets
Open Settings > Saved Data and Game/App Settings > Game Presets and set defaults for difficulty and camera inversion.
Choose first-person and third-person inversion so both FPS and TPS launch with your preferred axes. This prevents awkward aim flips during the opening moments of a new title.
Choose Performance or Resolution by default
Set a default Performance vs Resolution preference so supported titles auto-select your choice. I use Performance for fast action and switch to Resolution for cinematic play.
Note: ps5 pro titles may expose extra enhanced options. Pairing presets with those options gives steady results across titles.
- I use Game Presets so each new game loads with my difficulty and camera choices.
- Set Performance as the baseline for competitive sessions and Resolution for story moments.
- Quick test: start a new shooter and confirm axes are inverted automatically.
“Small preset choices reduce setup friction and keep you playing faster.”
Capture, broadcast, and save storage space like a creator
I treat captures and broadcast settings as the first line of defense against wasted storage. Small choices here keep your drive clear and make sharing cleaner.
Disable auto-recording at Settings > Captures and Broadcasts > Captures and Broadcasts Settings. I turn off automatic clips so idle highlights don’t fill my SSD. This saves space and avoids long cleanup sessions later.

Quick capture controls and keyboard shortcuts
Press and hold the Share/Create button for instant screenshots. If a keyboard is attached, Print Screen also captures quickly. I sometimes remap the button so a single tap records short clips instead of screenshots.
Practical settings I use
- I set a consistent capture resolution and file format to balance quality and file size.
- Turn overlays and party chat off in Broadcast settings when I want clean content for uploads.
- Archive favorites monthly to an external drive or cloud storage to preserve free space.
- Mute notifications while recording so pop-ups don’t ruin shareable clips.
- Use clear naming conventions for files so clutch moments are easy to find later.
| Action | Menu Path | Why I do it |
|---|---|---|
| Disable auto-recording | Settings > Captures and Broadcasts > Captures and Broadcasts Settings | Prevents unwanted clips from using storage |
| Set capture resolution | Settings > Captures and Broadcasts > Capture Settings | Balances quality and file size |
| Remap Create button | Accessories > Controller Settings | Faster access to preferred capture action |
| Toggle broadcast privacy | Captures and Broadcasts > Broadcast Settings | Control who sees live streams |
“Good capture settings save space and make your best moments easy to reuse.”
Privacy, notifications, and spoilers under control
I tune who can ping me and when, so only key friends interrupt game time. Good notification hygiene keeps sessions focused and streams clean.
Quick start: open the top right corner gear, then go to Settings > Notifications. You can toggle pop-ups off globally or customize alerts per event. I set time-based rules that mute things like party invites during captures or things like streaming.
Guard story beats and shared content
Visit Saved Data and Game/App Settings > Spoiler Options and enable Warn about Game Spoilers. That flags captures and shared clips so surprise moments stay intact.
Keep friend alerts meaningful
In Notifications > When Friends Go Online I pick specific names to notify me. I maintain a short list of close friends and rivals so join windows are useful, not noisy.
“Thoughtful privacy and spoiler controls help you focus and enjoy story beats as intended.”
- Hide sensitive details in pop-ups while streaming for privacy.
- Combine notification haptics with minimal banners for discreet cues.
- Some party and share features are enhanced if you have playstation plus.
I revisit these settings as my social habits change so alerts stay helpful and unobtrusive.
Power behavior, charging, and stealth startup tweaks
Rest Mode can be your best friend for charging and quiet startups if you set it up right. I made a few changes in system menus that keep controllers and headsets full, reduce LED glow, and tame startup sounds for late sessions.
Set USB power to Adaptive for full charging
Open System > Power Saving > Features Available in Rest Mode > Supply Power to USB Ports and choose Adaptive. This lets devices continue charging while the console sleeps and stops draw after a device hits 100%.
I also tidy Rest Mode so downloads and updates run overnight. That keeps maintenance out of my play time.
Dim LEDs and silence the startup chime
Go to Beep and Light in settings and set brightness to Dim or Medium. Reduce or mute the startup chime so the unit is stealthy when you power on.
A short press of the power button enters Rest Mode; a long press opens the power menu if you prefer manual control.
- I check cable quality for fast charging and stable data when devices sit near the console.
- Use a vertical stand and simple cable management so USB ports stay accessible for multiple devices.
- Balance power saving with convenience based on how often I play; firmware updates can reset defaults, so I review these options after updates.
“Adaptive USB power saves energy and ensures accessories finish charging without needless drain.”
PlayStation Plus benefits, Sony Pictures Core, and enhanced games
I break down each subscription level so you know which offers cloud saves, monthly titles, and streaming perks.
playstation plus comes in Essential, Extra, and Premium tiers. Essential covers online play and monthly downloads. Extra adds a large Game Catalog. Premium brings cloud streaming, classics, and game trials.
Pick a tier by what you need
I match features to habits: choose Essential for online play, Extra for a broad catalog, and Premium if you want cloud saves, trials, and movie extras.
Install Sony Pictures Core for film access
If you have Premium, add Sony Pictures Core from Media & App Library. This unlocks select films and makes media part of your console routine.
Find Enhanced titles for ps5 pro
Look for “Enhanced” badges in the PlayStation Store. Those titles often push higher frame rates or resolution that pair well with ps5 pro performance.
- Audit your library against the current Game Catalog so you avoid re-buying owned titles.
- Set calendar reminders for monthly games and trials so nothing expires unnoticed.
- Try Ubisoft+ Classics and the Classics Catalog if you like revisiting older releases.
- Use Premium cloud streaming for quick demos when your network supports it.
“Verify region availability — catalogs vary and some items may not appear in every country.”
Quick checklist: confirm your tier, install Sony Pictures Core if Premium, scan the Store for Enhanced games, and mark monthly drops on your calendar.
Safety nets: Safe Mode, mic controls, BD-Live, and system cleanup
I use a small routine that covers Safe Mode access, quick mic tricks, Blu‑ray extras, and light cleaning. These steps protect installs and keep hardware running cool.
Safe Mode for stubborn issues
Turn off the console by holding the power button for three seconds. Then press and hold the power button until you hear the second beep (about seven seconds).
Connect your controller via USB and press the PlayStation button. Use Safe Mode options to rebuild the database or reinstall system software when installs or saves feel corrupted.
Fast mic and audio mute
Tap the PlayStation button and select Mic to toggle mute. Or press and hold the mute button to mute both mic and game audio instantly.
BD‑Live and a quick cleaning routine
Open Settings > Screen and Video and enable “Allow Internet Connection for BD‑Live” for select Blu‑ray extras.
For cleanup: power off, unplug, remove the stand and faceplates, then clear vents and ports with short compressed‑air bursts. Back up any critical data game saves to cloud or USB before heavy troubleshooting.
| Action | How | Benefit |
|---|---|---|
| Access Safe Mode | Power off → hold power until beep → USB + PlayStation button | Repair database or reinstall software |
| Quick mute | Tap PlayStation → Mic OR hold mute button | Instant mic or full audio mute |
| BD‑Live | Screen and Video > Allow Internet Connection for BD‑Live | Access Blu‑ray online extras |
| Light cleaning | Unplug, remove faceplates, short compressed air bursts | Prevent overheating and throttling |
“A cool, clean console is a reliable console—back up saves before big fixes.”
Conclusion
I end with a compact set of tips tricks and a plan you can use right now.
I’ve got thirteen targeted optimizations covering display, audio, storage, privacy, and safety. I’ve got short steps for Control Center and presets so your setup reflects how you play. Make sure your profiles match daily habits.
Let say you swap between shooters and RPGs: save two quick profiles and flip them fast. Let say you notice stutter, test VRR and 1440p after patches or a new display. Let say friends change, make sure notifications alert your closest crew so you jump into the games want play.
Monthly sweeps—firmware, captures, and lists—keep space and order. I’ve got small things like haptic cues, OLED dim, and Adaptive USB power that quietly improve each session. I’ve got faith that small tweaks add up: tune, test, refine, and enjoy every game.
FAQ
How do I open the Control Center quickly?
Tap the PlayStation button on your DualSense once to open the Control Center for fast access to audio, captures, and game shortcuts.
How can I mute my mic and game audio instantly?
Press and hold the mute button on the controller to silence both your mic and incoming game chat immediately.
How do I edit widgets and rearrange my Home screen?
From the Home screen open the widgets area. Use L1/R1 to resize and press Square to move or rearrange widgets and pinned items.
Can I change my background and add animated themes?
Yes. Open the top right corner options in the Home screen, choose Change Background, and select animated themes or custom wallpapers.
How do I lock favorite games to remain on the Games home screen?
Highlight the game you want, open Options, and choose Keep in Home to pin it so it always shows on your Games home screen.
What display settings improve performance and latency?
Enable VRR (Variable Refresh Rate), test 1440p output, and use Performance mode in supported titles to reduce input lag and sustain higher frame rates.
How do I enable VRR for unsupported games?
Go to Screen and Video settings, enable VRR, and toggle the option to apply VRR to unsupported games when you prefer smoother output despite minor tearing risks.
What should I do to protect an OLED TV from burn-in?
Reduce static HUD time, enable screen dimming while idle, and avoid long sessions on paused screens to minimize burn-in risk.
How do I set up immersive 3D audio or Dolby Atmos?
Create a 3D Audio Profile in Sound settings, set HDMI device type to your speaker setup, and enable Dolby Atmos or compatible formats if your hardware supports them.
Can I control music from the console?
Yes. Add Spotify or Apple Music in the Media section, sign in, and use the Control Center to play, pause, or double-tap the PlayStation button to manage tracks quickly.
How do I lower DualSense input latency?
Switch the Communication Method to USB cable in Accessories settings to reduce wireless latency, and keep firmware updated for the best performance.
What power-saving options help extend controller life?
Set the controller idle time to 10 minutes or less in Power Saving settings so it powers down sooner when unused, preserving battery and reducing noise.
How do I improve download speeds and reduce lag online?
Lock your Wi‑Fi band to 5 GHz or 6 GHz for less congestion, or use a wired Ethernet connection for stable bandwidth and lower ping.
How can I organize my game library for quick access?
Create Game Lists for categories like VR, co‑op, or PS4 games, and use the options menu to rename, delete, or reorder those lists to suit your play habits.
What are the best ways to move PS4 saves and content to PS5?
Use PlayStation Plus cloud saves to download saved data, run the Data Transfer tool and hold the power button until the second beep during setup, or copy saves to a USB drive and import them on PS5.
How do I upgrade PS4 game versions on my PS5?
Disc owners insert the PS4 disc to claim and play the upgraded version while keeping the disc inserted. Digital owners claim the upgrade from the game hub; use the game options menu to switch between PS4 and PS5 versions.
How can I set default presets for difficulty and camera across games?
Go to Saved Data and Game/App Settings > Game Presets to set defaults for FPS/TPS inversion, preferred difficulty, and performance versus resolution choices.
How do I save storage and manage captures and broadcasts?
Disable auto-recording in Captures and Broadcasts, press and hold the Create/Share button for manual clips, and delete or transfer files to an external drive to free space.
How do I control notifications and avoid spoilers?
Open Notifications settings from the top right corner gear to toggle events off or customize alerts. Enable spoiler warnings in Game/App Settings to hide plot details.
What power and startup tweaks can I use for stealth and charging?
Set USB power to Adaptive in Rest Mode for device charging, dim LEDs in the system settings, and lower or mute the startup chime for quieter boot behavior.
Which PlayStation Plus tier should I pick?
Choose the tier that matches your needs: Essential for online play and cloud saves, Extra for a large game catalog, and Premium for trials and cloud streaming—compare benefits before subscribing.
How do I use Safe Mode for troubleshooting?
Power off, then hold the console power button until you hear the second beep. Connect a controller via USB, press the PlayStation button, and follow Safe Mode options for repairs or reinstalling software.
How do I mute my mic quickly without going into menus?
Tap the PlayStation button, then select Mic or press and hold the controller mute button to toggle all mic and voice input off immediately.
Should I enable BD‑Live for Blu‑ray features?
Enable BD‑Live in disc playback settings if you want online extras for Blu‑ray movies; otherwise disable it to reduce background network usage and potential privacy concerns.